

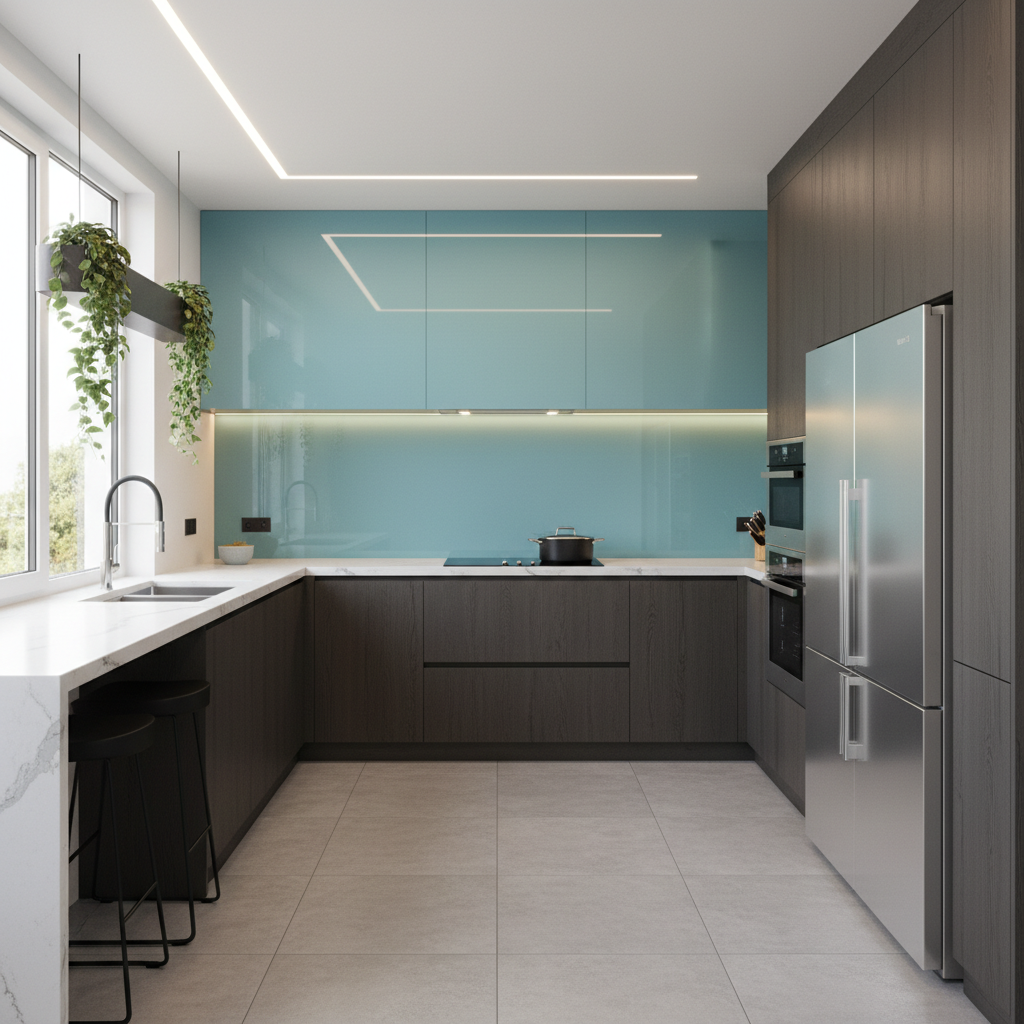
A glass splashback is a popular choice for modern homes because it delivers a sleek look, excellent durability, and easy cleaning. But achieving that flawless result isn’t just about choosing the right colour—it’s about following the glass splashback installation process correctly, from the very first measure to the final fit.
Below is a clear, step-by-step guide that reflects a professional, industry-standard approach consistent with how Glazewell installs glass splashbacks across kitchen splashback‘s and bathrooms in Perth.
Key Takeaways
- Accurate measuring and preparation are critical for a perfect result
- All splashbacks are made from toughened safety glass for strength and heat resistance
- Professional installation ensures a seamless surface, correct gaps, and long-term durability
- Proper care keeps your new splashback looking pristine for years
Step 1: Site Check & Accurate Measurements
Every successful glass splashback installation starts with accurate measurements. This stage happens after cabinetry, countertops, and appliances are installed.
Installers measure:
- The full wall area to be covered
- Locations of power points, switches, and appliances
- Any required cut outs
- The bottom edge alignment with benchtops
Tools like a tape measure and spirit level are used to ensure precise, square measurements. Even a few millimetres out can affect the final fit, so precise measurements are non-negotiable.
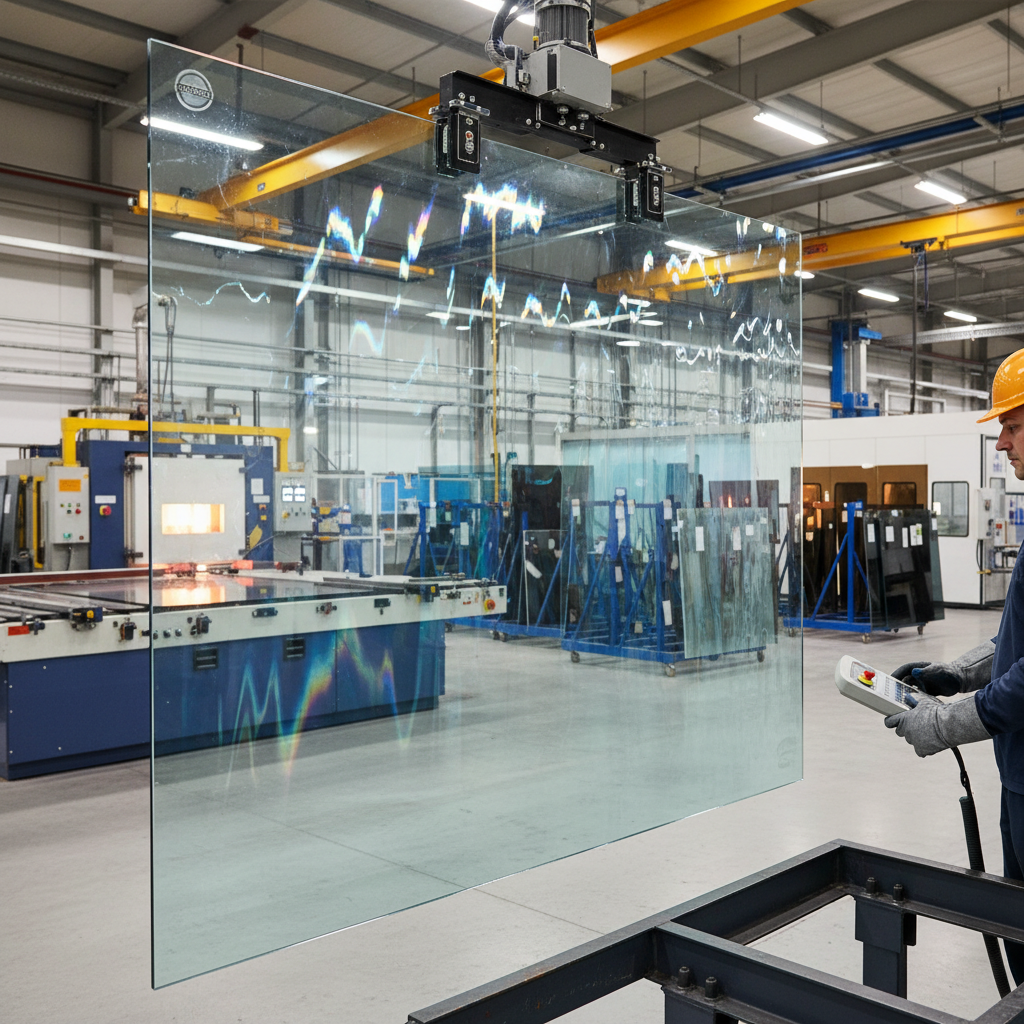
Step 2: Glass Selection & Manufacturing
Once measurements are confirmed, the splashback is manufactured from toughened glass (also known as tempered glass). This is not standard glass—it’s been heat-treated to make it:
- Heat resistant and suitable behind cooktops
- Highly resistant to impact
- Safe, as it crumbles rather than shards if broken
This process creates a toughened glass splashback that’s suitable for both kitchen or bathroom use, even in areas exposed to high temperatures.
At this stage, your chosen splashback colour or finish (clear, painted, mirrored, or textured) is applied to the rear of the glass.
Step 3: Wall Preparation & Right Preparation
Before installing a glass splashback, the installation area must be properly prepared.
This includes:
- Ensuring the surface is flat, clean, and dry
- Removing grease, dust, or residue
- Checking for existing tiles if applicable
The right preparation ensures the adhesive bonds correctly to the entire surface of the glass and wall.
Step 4: Adhesive Application & Positioning
A specialist, heat-rated adhesive is applied to the back of the glass. Installers use:
- Even adhesive coverage
- A thin bead where required
- Care to avoid excess adhesive squeeze-out
The glass splashback is then lifted into place and installers carefully position it against the wall, using spacers to maintain a small gap or expansion gap around edges. This gap allows for natural movement due to temperature changes.
This part of the fitting process requires experience and the right tools—it’s one of the biggest reasons professional installation is recommended.
Step 5: Levelling, Gaps & Silicone Sealing
Once positioned, the splashback is checked again with a spirit level to ensure it sits perfectly straight across the wall.
A colour-matched silicone sealant is then applied:
- Along the bottom edge
- Around edges and corners
- Around power points if required
This creates a waterproof, flexible seal and contributes to the final seamless surface and sleek appearance.
The adhesive cures over the next 24–48 hours, depending on conditions.
Step 6: Final Inspection & Clean
After installation:
- Protective spacers are removed
- The glass surface is cleaned
- Edges and seals are inspected
Once complete, your new splashback is ready to use—a stylish and practical addition that instantly lifts the room.
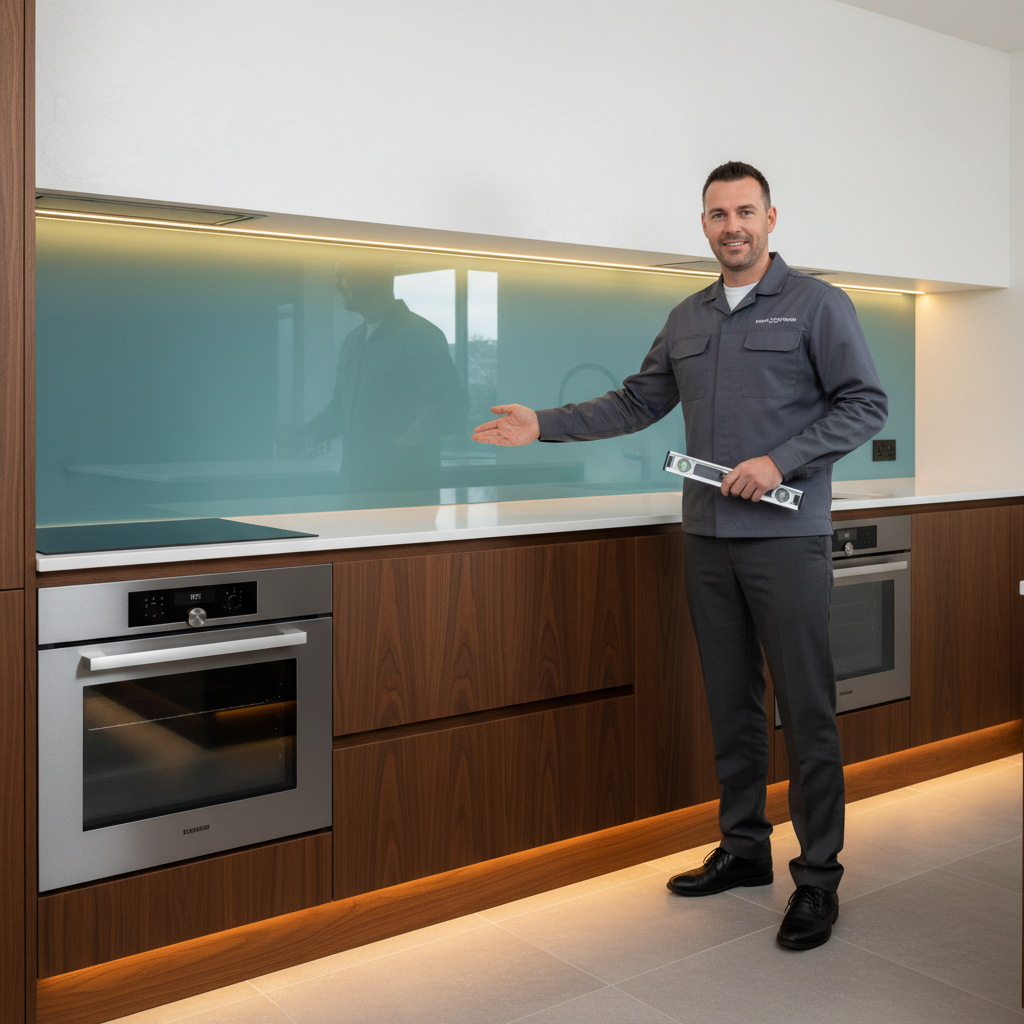
Why Professional Installation Matters
While DIY kits exist, professional installation delivers important practical benefits:
- Correct allowance for expansion and movement
- Safe handling of toughened safety glass
- Clean, even silicone finishes
- Protection against cracking or stress
Glass splashbacks provide both visual impact and long-term performance—but only when installed correctly.
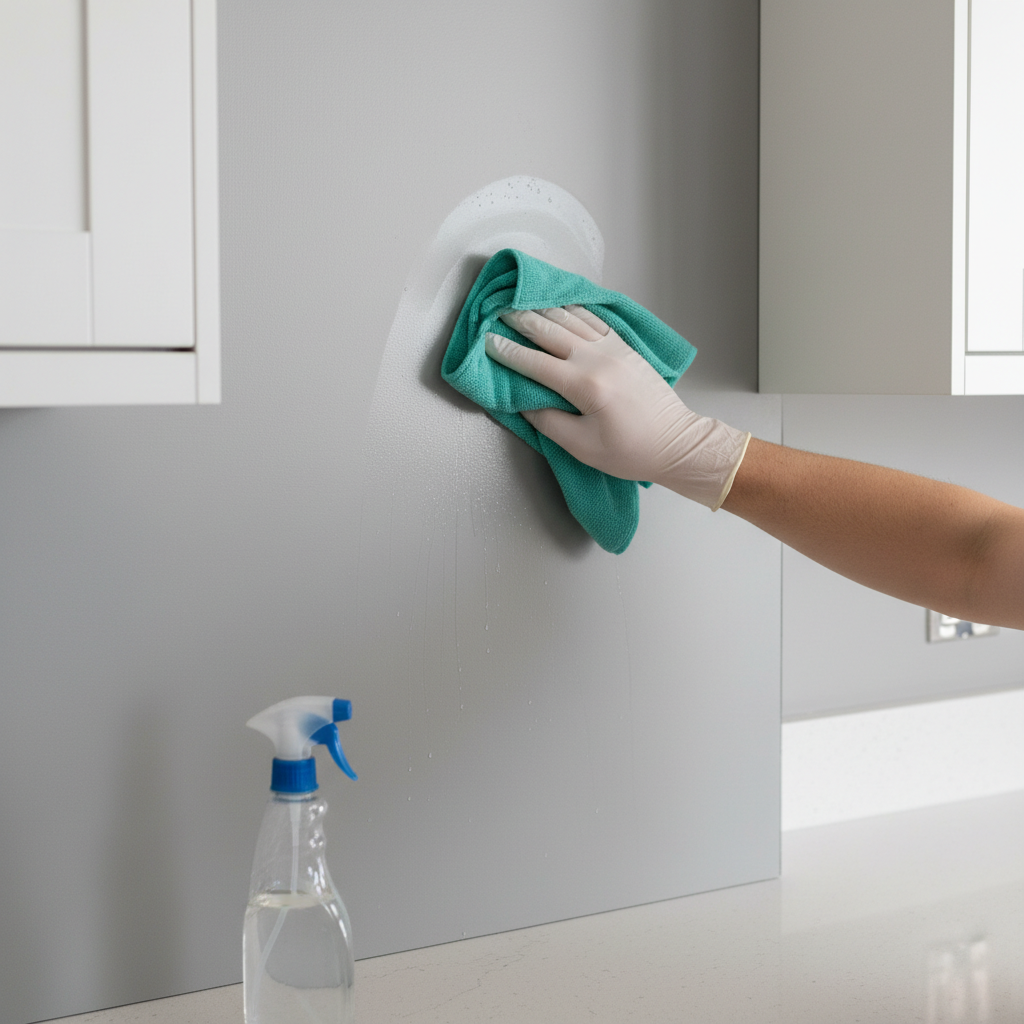
Cleaning & Ongoing Maintenance
One of the biggest advantages of a glass splashback is easy cleaning.
Best practice:
- Wipe regularly with a soft cloth or microfibre
- Use mild cleaners—avoid abrasive cleaners and harsh chemicals
- Avoid ammonia based cleaners on specialised finishes
- For marks or stains, use warm water and gentle detergent
Regular cleaning helps remove dirt, prevent water spots, and maintain the splashback’s visual appeal.
Final Thoughts
From first measure to final seal, the glass splashback installation process is about precision, preparation, and expertise. When done properly, a glass splashback becomes a stylish and functional addition—one that reflects light, enhances space, and stands up to everyday use.
If you’re planning a renovation or upgrading a kitchen or bathroom, investing in professional installation ensures your splashback doesn’t just look good on day one—but for years to come.